
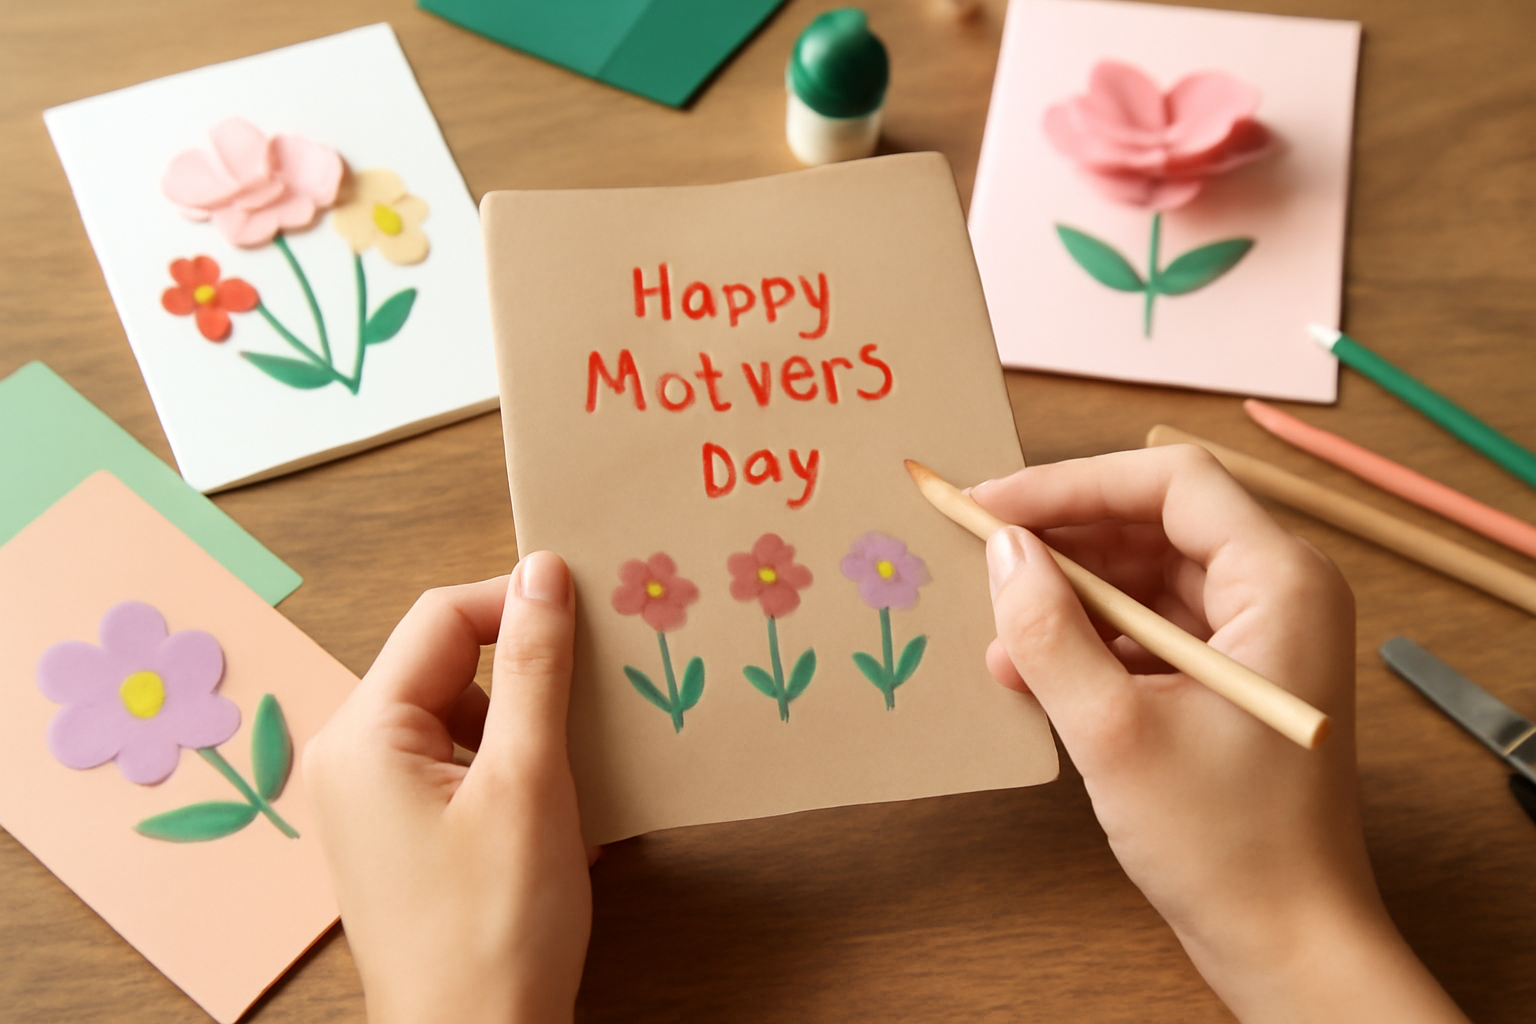
Mother's Day is the perfect occasion to show appreciation for the incredible women in our lives. What better way to express your love and gratitude than with a personalized DIY Mother's Day card? Not only are these cards a thoughtful gesture, but they also allow for creativity and a personal touch that store-bought cards just can't match.
In this guide, we'll walk you through the steps to create beautiful DIY Mother's Day cards that will surely bring a smile to Mom's face. From choosing materials to adding heartfelt messages, we've got you covered!
Table of Contents
Step 1: Gather Your Supplies
Before diving into your card-making adventure, it's essential to gather all the necessary materials. Here's a list of what you'll need: The Ultimate Guide to Mother's Day Cards and Messages.
- Cardstock or high-quality paper
- Colored markers or pens
- Stickers or embellishments
- Glue or double-sided tape
- Scissors
- Ruler and pencil
- Optional: stamps and ink pads
Having these supplies ready will make your card-making process smooth and enjoyable! crafting meaningful messages.
Step 2: Plan Your Design
Think about the overall theme and design of your card. Here are some ideas to inspire you:
Choose a Theme
Popular themes include floral designs, heartfelt messages, and fun illustrations. Consider what your mom loves most-maybe she has a favorite flower or color.
Sketch Your Layout
Before you start cutting and gluing, sketch your card's layout on a piece of scrap paper. This will help you visualize the placement of text and images.
Step 3: Create the Card Base
Once you have a plan, it's time to create the card base. Follow these steps:
- Cut a piece of cardstock to your desired size. A standard size is 5x7 inches when folded.
- Fold the paper in half to form the card.
- Use a ruler and pencil to create a light guideline for your designs.
Step 4: Add Personal Touches
This is where the fun begins! Here's how to add personal touches to your card:
Write Personalized Mother's Day Messages
Incorporate meaningful messages for mothers that resonate with your relationship. You can include sentimental messages for Mother's Day that reflect your love and appreciation. Here are some examples:
- "Mom, you are my guiding light. Happy Mother's Day!"
- "To the world, you are a mother, but to our family, you are the world."
Incorporate Photos or Drawings
If you have a favorite photo together, consider printing it and attaching it inside the card. If you're feeling artistic, draw something special that represents your bond.
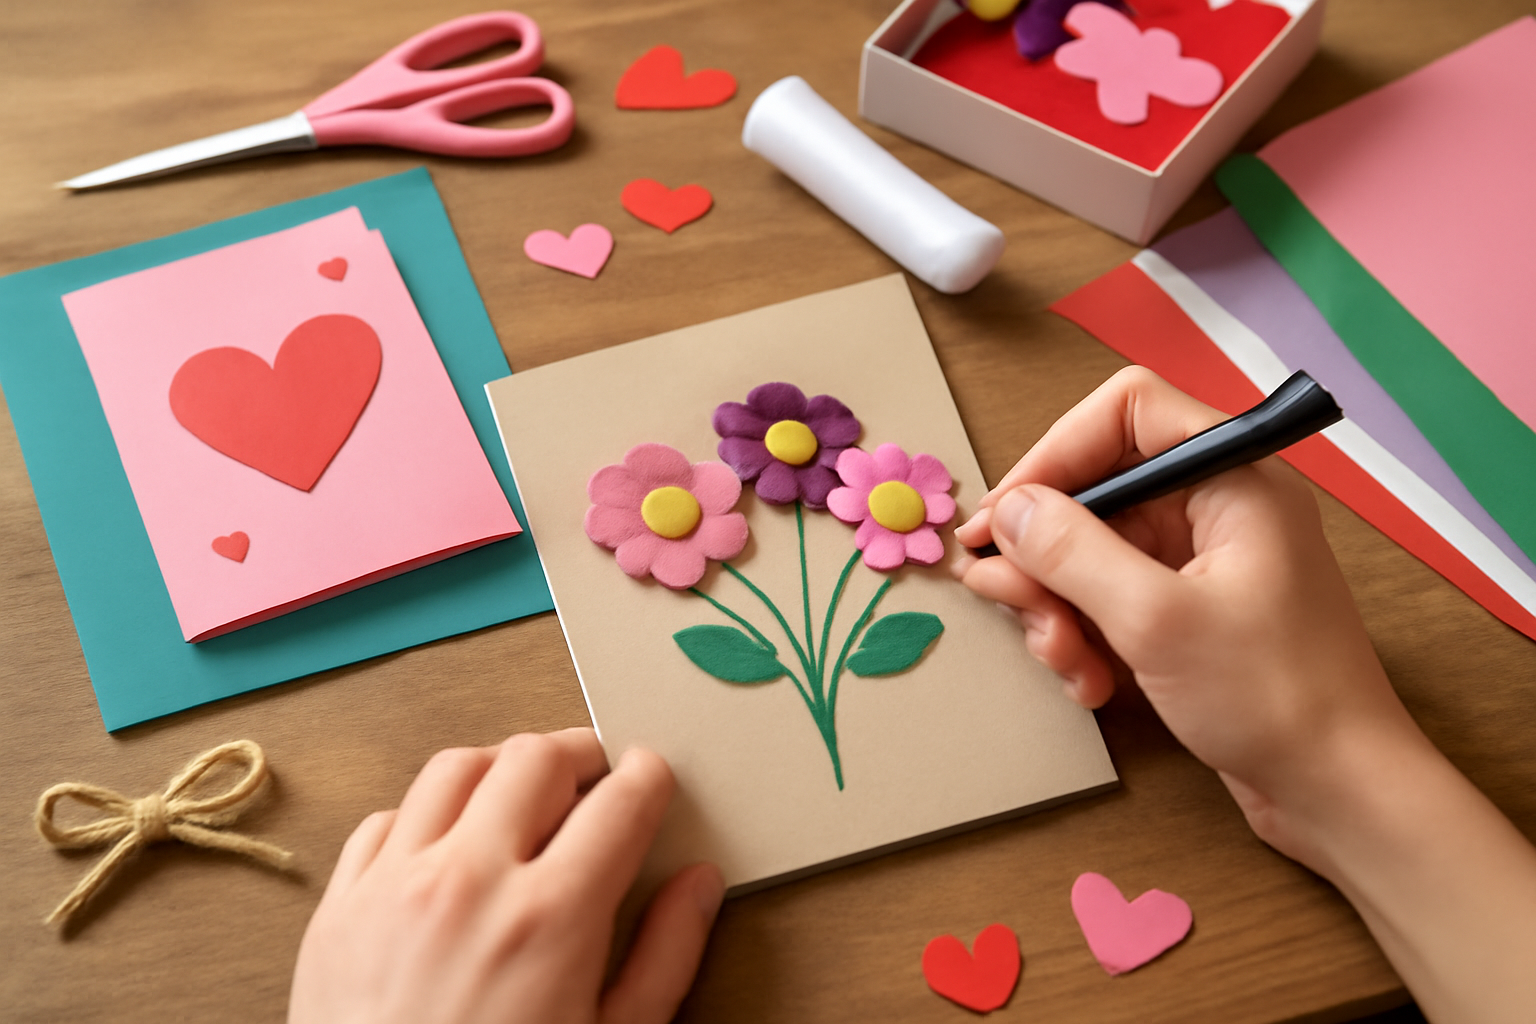
Step 5: Embellish and Decorate
Now that your messages and designs are in place, it's time to add some flair. This is where your creativity can truly shine, transforming a simple card into a heartfelt masterpiece. Here are some practical tips to help you embellish and decorate your DIY Mother's Day cards:
- Use stickers, washi tape, or glitter to enhance your card. Stickers can add fun elements like flowers, hearts, or cute animals. Washi tape comes in various patterns and can be used to create borders or frames. Just remember, less is often more-too many embellishments can overwhelm your card.
- Consider adding texture with fabric scraps or ribbon. A small piece of lace or burlap can give your card a rustic feel, while satin ribbon can add elegance. You can create bows, flowers, or even layered effects by gluing fabric in different sections of the card.
- Don't forget to decorate the envelope to match your card! A beautifully decorated envelope can make the card feel even more special. Use similar colors or themes as your card, and consider adding a personal touch like a hand-drawn doodle or a sweet message on the back. You can even use stamps or stencils to create a cohesive look.
Ideas for Embellishments
Here are some specific ideas to get your creative juices flowing:
- 3D Elements: Use foam tape to raise certain elements off the card for a 3D effect. This can be particularly effective for flowers or other decorative pieces.
- Personal Touches: Incorporate personal items like a small photo of you and your mom or a pressed flower from her garden. This adds a unique and sentimental touch.
- Handwritten Quotes: Instead of printing out quotes, consider writing them by hand. Your handwriting adds a personal touch that printed text simply can't replicate.
- Colorful Markers: Use colored gel pens or markers to draw borders, doodles, or even to color in stamped images. This can make your card pop with color and personality.
Common Mistakes to Avoid
While embellishing your card, keep these common mistakes in mind to ensure you create a polished final product:
- Overcrowding: It's easy to get carried away with embellishments. Aim for balance; leave some white space to allow your design to breathe.
- Ignoring the Theme: Make sure your embellishments align with the theme of the card. For example, if you're going for a floral theme, don't throw in random geometric stickers.
- Neglecting Adhesives: Ensure you're using the right adhesive for your materials. Some embellishments may require stronger glue or double-sided tape, especially if they are heavier.
- Forgetting to Let It Dry: If you're using glue or paint, give it ample time to dry before handling the card further. Smudging can ruin your hard work!
Final Touches
Once you've added all your embellishments, take a step back and review your card. Here are a few final touches to consider:
- Check for Consistency: Ensure that the colors and styles you've used are harmonious. A quick glance can help you see if something feels out of place.
- Sign Your Name: Don't forget to sign your name or add a personal message inside the card. This final touch makes it clear who the card is from and adds a personal connection.
- Protect Your Creation: If you're worried about damage, consider placing your card in a protective sleeve or using a spray sealant for any painted elements.
With these tips, your Mother's Day card will not only be a heartfelt message but also a beautiful keepsake that your mom will cherish for years to come. Happy crafting!
Step 6: Write a Heartfelt Closing
Finish your card with a touching message. It could be a simple "I love you" or a more elaborate note expressing your feelings. This is your chance to wrap up your card with love!
Crafting Your Message
When it comes to writing the closing message, think about what makes your relationship special. Here are some ideas to inspire you:
- Personal Anecdotes: Share a cherished memory that reflects your bond. For example, "I still remember that time we baked cookies together and made a mess in the kitchen-those were the best days!"
- Compliments: Highlight her best qualities. You could say, "Your kindness and strength inspire me every day. I am so grateful to have you in my life."
- Future Plans: Mention something you look forward to doing together. For instance, "I can't wait to take that trip we've been talking about for ages!"
Examples of Heartfelt Closings
If you're struggling to find the right words, here are a few examples to get you started:
- "Thank you for being the amazing mom that you are. I love you more than words can say!"
- "Every day, I am grateful for your love and support. You mean the world to me!"
- "Happy Mother's Day! I hope your day is as beautiful as you are!"
Common Mistakes to Avoid
While writing your closing message, keep these common pitfalls in mind:
- Being Too Generic: Avoid clichés that may come off as insincere. Personalize your message to make it more meaningful.
- Overly Complicated Language: Keep it simple and heartfelt. You don't need to use flowery language; sincerity is what counts.
- Neglecting to Sign Your Name: Don't forget to sign your card! A simple "Love, [Your Name]" adds a personal touch.
Final Touches
After writing your heartfelt closing, consider adding a little extra flair to your card:
- Decorative Sign-offs: Use colorful markers or stickers to add flair to your signature. Perhaps draw a small heart or a flower next to your name!
- Quotes or Poems: If you find a quote or a short poem that resonates, feel free to include it as part of your closing. It can add a unique touch to your card.
- Encouraging Words: If she's going through a tough time, offer words of encouragement. Something like, "Remember, I'm always here for you!" can be uplifting.
With these tips, your closing message will undoubtedly leave a lasting impression. Remember, the key is to speak from the heart and let your feelings shine through. Happy crafting!
Step 7: Present Your Card
The last step is presenting your card! You can surprise your mom by leaving it somewhere she'll find it or hand it to her with a bouquet of flowers. Remember, it's the thought and effort that counts!
Here are some creative ways to present your DIY Mother's Day card that will surely bring a smile to her face:
1. Surprise Locations
Think outside the box when it comes to hiding your card. Here are a few ideas:
- In Her Favorite Book: Slip the card into the pages of a book she loves. When she opens it, she'll find your heartfelt message.
- Under Her Pillow: Place the card under her pillow so she discovers it when she goes to bed. It's a sweet surprise to end her day.
- In the Kitchen: Hide it in a kitchen drawer or inside her favorite mug. Every time she reaches for them, she'll find your card.
- On the Bathroom Mirror: Use a bit of tape to stick the card on the bathroom mirror. She'll see it first thing in the morning!
2. Accompanying Gifts
Pair your card with a small gift to enhance the surprise. Here are some ideas:
- Flowers: A classic choice! Present your card with a bouquet of her favorite flowers. The combination of a personal card and fresh blooms is sure to delight.
- A Sweet Treat: Attach your card to a box of her favorite chocolates or homemade cookies. This sweet gesture will make her day even more special.
- Personalized Item: If you've created a personalized gift, like a mug or a piece of wall art, present the card alongside it as a thoughtful touch.
3. Creative Presentation Ideas
How you present your card can make a significant difference. Here are some fun and creative ways to do it:
- Gift Basket: Create a small gift basket with the card, some snacks, and a little pampering item like bath bombs or scented candles.
- Balloon Surprise: Attach the card to a helium balloon. When she pops the balloon, she'll find your card inside!
- In a Frame: If you have a beautiful frame, consider framing the card. It adds a personal touch and can be displayed as a piece of art.
4. The Delivery Method
How you deliver the card can also add to the experience:
- Hand Delivery: If you want to make it extra special, hand the card to her with a big smile and perhaps a hug. Your enthusiasm will be contagious!
- Video Message: If you can't be there in person, consider recording a short video message while presenting the card. This adds a personal touch, especially if you live far away.
- Surprise Party: If you're feeling ambitious, organize a small surprise gathering with family and friends. Present the card during the celebration for an added emotional touch.
5. Common Mistakes to Avoid
While presenting your card may seem straightforward, here are some common pitfalls to avoid:
- Forgetting to Personalize: Make sure your card reflects your unique relationship with your mom. Generic messages can diminish the impact.
- Rushing the Presentation: Take your time! A rushed delivery can make it feel less special. Enjoy the moment.
- Neglecting the Wrap-Up: If you're pairing the card with a gift, ensure everything is nicely wrapped or presented. A well-thought-out presentation enhances the overall experience.
Ultimately, however you choose to present your DIY Mother's Day card, the key is to make it heartfelt and personal. Your effort will surely be appreciated and cherished! Happy crafting!
Common Mistakes to Avoid
Even the most seasoned crafters can make mistakes. Here are some common pitfalls to avoid:
- Using low-quality materials that may not last. Always opt for acid-free papers and quality adhesives to ensure your cards withstand the test of time. Consider testing a small sample of your materials before committing to the entire project.
- Forgetting to plan your design, leading to cluttered cards. Take a moment to sketch out your ideas or create a mood board. This can help you visualize the layout and color scheme, ensuring that your design is cohesive and aesthetically pleasing.
- Rushing through the process-take your time to make it special! Crafting is about enjoying the journey as much as the end result. Set aside dedicated time for your project, free from distractions. This will allow you to focus on the details and truly personalize your cards.
Additional Mistakes to Watch Out For
- Neglecting to test your tools. Before diving into your card-making, make sure your scissors are sharp, your glue is working, and your stamps are inked properly. A quick test run can save you from frustration later on.
- Overcomplicating your design. While it's tempting to use every embellishment in your stash, sometimes less is more. Stick to a few key elements that highlight your message rather than overwhelm it. A simple, heartfelt card often resonates more than an overly decorated one.
- Ignoring the recipient's preferences. Consider the tastes and interests of the person you're making the card for. If they love minimalism, avoid busy patterns. If they adore bright colors, don't shy away from vibrant hues. Tailoring your design to the recipient makes the card more meaningful.
- Skipping the envelope! An envelope can add that final touch to your card. Consider decorating the envelope to match or complement your card design. It's all about the presentation!
- Forgetting to leave space for your message. Ensure that you leave enough room for a personal note. A heartfelt message can elevate your card from a simple craft to a cherished keepsake.
Checklist for a Successful DIY Mother's Day Card
To help you avoid these common mistakes, here's a handy checklist:
- Gather high-quality materials: card stock, decorative paper, markers, glue, scissors, and any embellishments.
- Sketch your design ideas and choose a color palette.
- Test your tools and ensure everything is functioning properly.
- Decide on the layout and leave space for your message.
- Craft your card slowly, enjoying the process and making adjustments as needed.
- Decorate the envelope to match your card.
- Write a heartfelt message before sealing it up.
By keeping these common mistakes in mind and following the checklist, you'll be well on your way to creating beautiful, personalized Mother's Day cards that your loved ones will treasure. Happy crafting!
Checklist for Your DIY Mother's Day Card
Before you dive into your card-making, ensure you have this checklist handy:
- All necessary supplies gathered?
- Design theme decided?
- Message written and proofread?
- Card decorated with embellishments?
- Envelope ready for delivery?
Step-by-Step Supply Gathering
Gathering supplies is the first step in your card-making journey. Here's a detailed list of what you might need:
- Cardstock: Choose a sturdy cardstock in your preferred colors. White or pastel shades work well for a classic look.
- Scissors: A good pair of scissors is essential for cutting out shapes, pictures, and card bases.
- Glue or Double-Sided Tape: Ensure your adhesive is strong enough to hold embellishments securely.
- Markers or Pens: Use colorful markers or pens for writing your message and adding decorative touches.
- Embellishments: Gather stickers, ribbons, sequins, or any other decorative items that match your theme.
- Stamps and Ink: If you enjoy stamping, include a few stamps that resonate with your theme.
- Ruler: A ruler can help you measure and create straight lines for a polished look.
Choosing Your Design Theme
Deciding on a design theme helps you maintain focus and coherence in your card. Here are some popular themes to consider:
- Floral: Use flower patterns or illustrations to create a beautiful, classic card.
- Photo Collage: Incorporate family pictures or memorable moments with your mom.
- Funny: If your mom has a sense of humor, a funny theme can add a light-hearted touch.
- Personalized: Use elements that reflect your mom's interests, like her favorite colors or hobbies.
Crafting Your Message
Your message is the heart of the card. Follow these steps to ensure it's heartfelt and meaningful:
- Brainstorm Ideas: Think about what you appreciate most about your mom. Jot down memories, qualities, or inside jokes.
- Draft Your Message: Write a rough draft of your message. Don't worry about perfection; focus on expressing your feelings.
- Proofread: Check for spelling and grammar mistakes. A well-written message shows you care.
- Personal Touch: Consider adding a personal anecdote or a quote that resonates with your relationship.
Decorating with Embellishments
Adding embellishments can elevate your card from simple to stunning. Keep these tips in mind:
- Balance: Don't overcrowd your card. Choose a few key embellishments that complement your design.
- Layering: Experiment with layering different materials, like ribbons over cardstock or stickers on top of photos.
- Color Coordination: Ensure that your embellishments match or complement the card's color scheme.
Preparing the Envelope
Don't forget about the envelope! Here's how to prepare it for delivery:
- Size Check: Ensure your card fits snugly in the envelope without bending.
- Addressing: Write your mom's address clearly, and don't forget to add a return address if needed.
- Stamp: Put on the right postage. A little extra weight from embellishments might require additional postage.
- Seal with Love: Seal the envelope securely, and consider adding a sticker or a wax seal for a personal touch.
With this comprehensive checklist, you're well on your way to creating a memorable DIY Mother's Day card that your mom will cherish forever. Happy crafting!
Conclusion
Creating a DIY Mother's Day card is a heartfelt way to show your love and appreciation. By following these steps, you can craft a beautiful card that is personalized just for her. So gather your supplies, unleash your creativity, and get started on a project that will bring joy to your mom's special day!


